Showing posts with label refinish. Show all posts

Modern Art


Did you all have a good weekend? Hope yours was filled with celebration, smiling faces, and chocolate. Lots of chocolate.

Its about time I updated you on the living room, right? No surprise, its not quite done yet. We're still waiting on fireplace tile. And when we reassembled the hutch, one of the glass panes broke. Bummer - but we've got some creative ideas on how to fix it. How about I just show you one thing that is finished?


Here's the dresser all pretty and painted. Its Schoolhouse Slate paint by Martha Stewart and I'm so happy with the colour. It looks a little light in these photos, but its actually a great mid-tone bluey-greeny-grey. I decided to keep the original hardware (for now), though Michael had a great suggestion on Facebook to go with a more "modern country" look. Hmmm.

We needed a piece of art to put over the dresser, at least temporarily, before Chloe's party. I really wanted something modern to provide some tension against the vintage dresser. So taking this blog as inspiration...
{photo from Amber Interiors}

...and this favourite vacation photo...


...we did this. HandyMan printed the photo at work (shh, Rebecca!) and put it in an Ikea Ribba frame. It was a great temporary fix but really we should put the print on some mat board to prevent the wrinkles you see. I've put some milk glass pieces and a little vase of flowers on the dresser, but I'm no stylist and have no idea what to put there. I've run out of pretty books and with the wee one around, I tend to keep accessories at a minimum. Suggestions?


 More living room to come...

The Painted Dresser

If you follow me on Facebook, you would have seen a photo similar to this...


It does kinda look like birch wallpaper like some of you guessed, but really its the pseudo painting booth HandyMan has set up in our garage. To prevent paint from getting everywhere, he stapled plastic dropsheets to one of the beams. They roll up and are tied with velcro straps when not in use - and you can see that in three years they've gotten a LOT of use. Like this weekend, where this pretty


got a coat of Martha Stewart's Schoolhouse Slate paint and is now looking like this...


LOVE. I was looking for a milky, moody, somewhat historical bluey-grey-green colour and who does that better than Martha? The paint will look darker when the dresser is moved inside. One more coat* and a polishing of the original hardware and we can move the dresser back into the living room. The room is coming together, slowly but surely.

*Did you know that oil-based paints are no longer being sold or manufactured in Canada? We used a high-gloss oil on Chloe's mini-chair and that thing has taken quite the beating and it still hasn't chipped. We wanted the same durable oil finish for the dresser but no luck. Stores are selling their remaining stock of oil based paints and primers and once they're gone, they're gone.

Chloe's Chair: Get a Grip

Time to tackle Chloe's chair! First step was to remove all the old fabric and those hundreds of nail tacks. Beneath the fabric, there was foam on the seat, back, front, and arms, which I'll be reusing. The seat of the chair was made of some leather straping over a muslin fabric. The back of the chair was made of two pieces of foam with a piece of cardboard sandwiched between them. Though the muslin is stained and a bit loose, the straping is still fairly taut and the cardboard is still nice and hard so I'm planning to just leave them all in place rather than remove and replace. So it looks like I can reuse everything; the only new parts will be the fabrics.


As I posted before, the part I was most worried about was how to do the actual tacking of the nails. Katie had a great suggestion for me - use flexible tacking strip instead. Flexgrip, also known as curvease or ply-grip, is a flexible strip with little metal teeth that grip onto the fabric. It makes finishing edges and working around curves very easy. I found mine at the Mississauga Fabricland location which carries upholstery supplies.


With the chair stripped bare, (and
this youtube video to guide me) I decided to test drive the flexgrip and see if I could do it myself. I cut a piece the length of the front of the seat. Using the original nail tacks, I nailed the strip, following the curve of the front. You can see I wasn't that precise with this test and some of the metal overhung the edge.


Once the metal was in place, I folded the back of the metal strip forward leaving a 1/4" gap. Then I put the foam back in place and wrapped the old fabric on top. Using a screwdriver, I tucked the edge of the fabric into the gap all along the strip. Finally, I used a rubber mallet to lightly tap the flexgrip down and close the gap.


And tada - here's how the flexgrip test turned out:


Not bad :) For the real thing, I'll have to install the flexgrip back from the wood edge and bring the foam and fabric forward so that I get a nice curved cushion and no metal parts pinching baby bums! We've put a coat of primer on the chair and should have all the paint and reupholstery done in the next few days. The colour we ended up choosing is so yummy I could eat the chair up!

Bedside Table Talk

I've been on the hunt for a pair of bedside tables for a few months now for our master bedroom remodel. Luckily, a trip to our favourite hotel liquidator proved fruitful and we came across these:


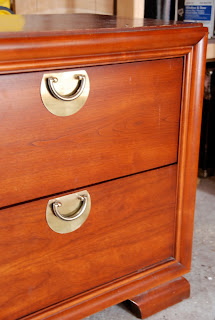
They're solid cherry and in great condition. Seems a shame to paint them, but paint them we will. The style reminds me of these refinished pieces:


(Images from Little Green Notebook)

I'm thinking the room will be painted white and will paint these in the accent colour, whatever that is. Canary yellow? Leaf green? Robin's egg blue? What colour do you think I should paint them?

Shop Spotlight: Frontier Sales

It seems HandyMan and I can't get enough of antique hunting these days. I'm on the lookout for a hutch for the living room. We found a great reproduction piece at Cornerstone but I'm sure with a little patience we can find something more authentic and at a better price. This weekend, we dropped by Frontier Sales, a treasure trove of a store filled to the brim with an eclectic mix of old and used furniture.

There were quite a few things that caught my eye. Like this cabinet. I love the oval handles and the trimwork in the glass doors. If I didn't already have a dozen half-finished projects sitting around the house, I might have scooped it up and painted it a la Eddie Ross.


This set of six rattan chairs was calling to me too. I like the interesting pattern of the backs. White paint is great for bringing out features like that. Pair it with some graphic fabric on the seat (like elements of style did with her dining chairs), and you have a some real standout seating.


If I were redoing the nursery, I would have scooped up these next two pieces. See that orange chair... solid wood construction, smooth rocking motion, sturdy foam, and comfortable... all for $45! Recover it in a pretty fabric like we did for our nursery glider and you'd have a perfect place to rock baby to sleep. The dresser would be a sweet piece in a little girl's room. I loved the curlicue details and the ring drawer pulls. For this, I'd paint it a robin's egg blue or pale pink and put some fun wrapping paper to line the drawers. Or you could paint the drawers like The Stamford Wife did with her dresser makeover.


When I saw this room divider, I immediately thought of this headboard featured in Canadian House & Home. I think a high lacquer black would really bring out the intricate details of this piece. Its a nice ethnic piece... mix it with rustic and modern pieces and white walls to make a statement.


Love these two headboards. The caning on the first piece isn't something you see often on a headboard. Such a nice, delicate look. I love the curves on the peach headboard. The velour fabric needs replacing, maybe with something dramatic, like the popular Chiang Mai fabric from Schumacher.


We didn't find the hutch we were looking for, but its always fun visiting stores like this to get ideas and the creative juices flowing! We're off to the Aberfoyle Fall Antique Show this weekend so fingers crossed we find something we like there.

Baby Blues

I mentioned in this post that I was considering painting Chloe's chair a robin's egg blue. Here's a pic I came across which shows exactly that look. Hmmm, not sure if I like it or not. It seems a little trendy, though I do love the colour.

Image from Room Service, found via Elements of Style

Hidden Treasures

There has been a lack of posting around these parts lately. HandyMan and I have been tied up with the selling of Mama HandyMan's house. She lived in the house for 40 years so you can imagine the amount of packing, purging, and cleaning we've had to do. Luckily, the house sold in no time (we even had multiple offers in this depressed market!), but closing was quick with only two weeks for us to clear out the old homestead. Not an easy feat with a newborn and HandyMan busy at his day job. Ya gotta do what ya gotta do though. The closing was yesterday (yay!) but we're left exhausted and HandyMan and I have had to fight fevers and chills over the past few days. It was all worth it though because we managed to unearth some hidden treasures in the move.


This is one of my favourites. This doll bed and vanity was handmade by Great Grandpa HandyMan. Mama HandyMan used to play with it as a young girl and with a little bit of cleaning up, Chloe will play with it someday too!

I love the craftsmanship - the arched feet of the vanity, the hinged mirror, the curved headboard. The bed features worn wallpaper appliques and can expand to house two dolls. The vanity is sweet as can be; there is the same damask wallpaper applique on the top and the drawers and mirror are all in working order. Don't you just love the crystal knobs :) We've never refinished furniture before so this will be a fun little project. It'll be nice too for Chloe to have a piece of family history.